


Backcountry Ski Safety Basics: What Every Skier Should Know
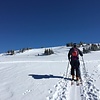
Backcountry ski safety means understanding avalanche risks, terrain, weather exposures, group management, and emergency preparedness before travelling outside resort boundaries. Unlike resort skiing, there are no lifts, no patrol response, and no avalanche control - you and your group are responsible for every decision.
This guide covers the essential basics of backcountry ski safety that every skier should know, including avalanche awareness, rescue gear, terrain traps, red flags, planning routines, and safe travel techniques. Whether you’re new to ski touring or refining your process, these principles help you reduce risk and build a disciplined backcountry routine.
Quick Checklist: Backcountry Ski Safety Essentials
- Read the avalanche forecast; match terrain to the day
- Carry beacon/shovel/probe and practice regularly
- Use conservative terrain when red flags appear
- Travel one-at-a-time through exposure and regroup in safe zones
- Maintain strong communication and clear decision points
- Bring navigation, first aid, and emergency insulation
- Prioritize avalanche education and guided learning
Why Backcountry Safety Matters (And What Changes Outside the Resort)
Resort skiing is managed: patrol mitigates avalanche hazard, terrain is controlled, signage is consistent, and help is relatively close. In the backcountry, you are responsible for everything: route choice, timing, communication, emergency response, and most importantly, avalanche terrain awareness. Mistakes can often compound, such as a small navigation error resulting in you being under a loaded slope late in the day or a minor injury becoming serious when the temperature drops and daylight fades.
Backcountry safety isn’t about eliminating risk (you can’t). It’s about managing risk through education, planning, discipline, and clear group practices.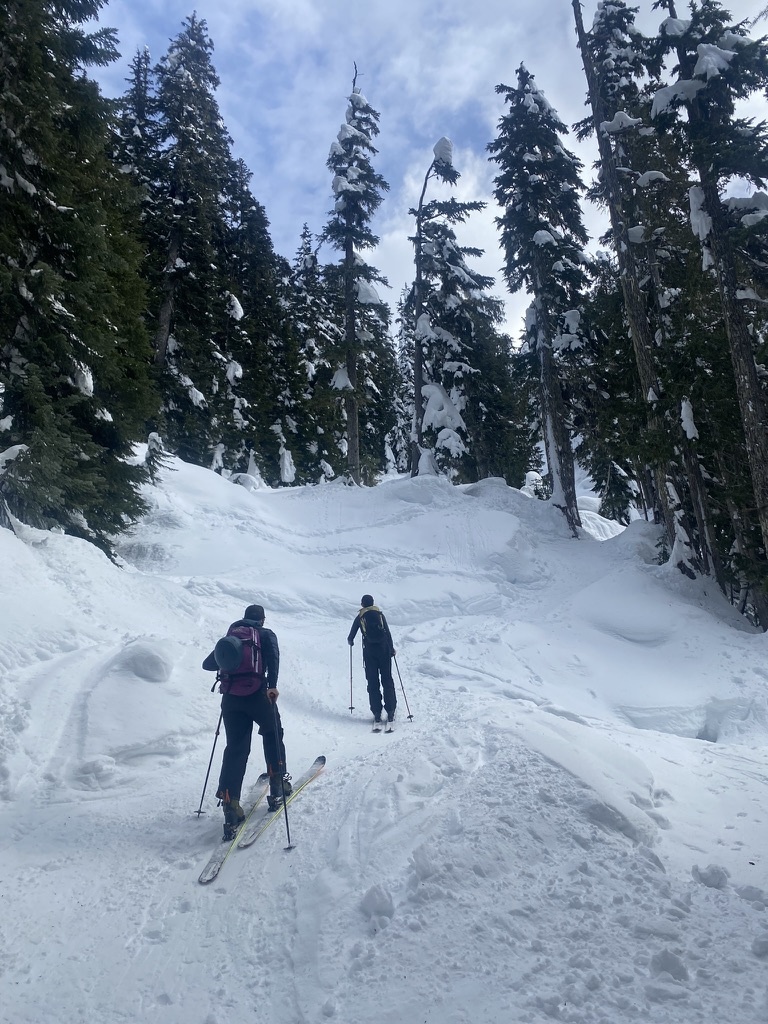
Avalanche Safety Basics: Learn the Problem Before You Chase the Powder
Most backcountry ski accidents that make headlines involve avalanches. That’s why avalanche safety basics should be your first focus before new skis, steeper lines, or “just one lap.” You don’t need to be a professional forecaster to make safer choices, but you do need to understand how avalanches form and where they happen.
What triggers an avalanche?
- Snowpack structure: Weak layers buried under stronger slabs are a classic setup.
- Recent loading: New snow, wind-transported snow (wind slab), or rapid warming can increase hazard quickly.
- Terrain: Steep slopes (typically 30–45°), connected start zones, and terrain traps amplify consequences.
- Triggers: A skier, snowmobile, cornice fall, or natural release during storms/warming.
Red flags you should never ignore
- Recent avalanche activity (natural or human-triggered)
- Whumphing or collapsing (a sign of weak layers)
- Shooting cracks propagating from your skis
- Heavy snowfall in the last 24–48 hours
- Wind loading (drifting snow, cornices, stiff pillows)
- Rapid warming or strong sun, especially on steep solar aspects
If you see red flags, scale back immediately, choose lower-angle terrain, avoid exposure to avalanche paths, or turn around. The safest decision is often the simplest one.
Avalanche Terrain Awareness: Where Accidents Actually Happen
Strong avalanche terrain awareness is one of the highest-impact skills you can build. Many incidents occur near “safe” zones, small features, short steep rollovers, or while transitioning, because people underestimate how connected terrain can be.
Key terrain concepts to know
- Slope angle: Avalanches are most common on slopes between ~30° and 45°. Learn to estimate angles visually and verify with an inclinometer app or tool.
- Start zone, track, runout: Don’t just avoid the steep part—avoid being underneath it, too.
- Terrain traps: Gullies, creek beds, cliffs, trees, depressions, and benches can magnify burial depth and trauma risk.
- Connected terrain: A small steep feature above can slide into your “low-angle” skin track.
- Wind effect: Ridges often load the lee side. Wind slabs can form quickly and feel “supportable” but dangerous.
Practical backcountry skiing tips for choosing safer terrain
- Have an angle target: on higher hazard days, keep it under 30° and stay out from under overhead slopes.
- Use ridgelines and dense trees carefully: they can reduce exposure, but trees don’t make steep slopes “safe.” Tree wells are also a hazard.
- Plan transitions away from runouts: Don’t regroup at the bottom of a path or under a cornice.
- Watch for convexities: Rounded rollovers are common trigger points.
Pre-Trip Planning: Your Best Safety Tool Starts at Home
Good ski touring safety begins before you click into your bindings. Pre-trip planning helps you avoid decision fatigue and reduces the chance you’ll “wing it” in complex and/or unfamiliar terrain.
1) Read the avalanche forecast (and understand it)
Check your regional avalanche centre forecast the night before and again in the morning. Focus on:
- Danger rating by elevation (alpine/treeline/below treeline)
- Avalanche problems (storm slab, wind slab, persistent slab, wet loose, etc.)
- Aspect and elevation where the problems are most likely to be
- Travel advice (what terrain to avoid today)
Create a plan that aligns with the forecast, rather than relying on it.
2) Check weather, wind, and daylight
- Wind: Can rapidly load slopes and create wind slabs.
- Temperature trend: Warming increases wet avalanche risk and can destabilize slabs.
- Visibility: Flat light and storms increase navigation errors and exposure time.
- Daylight: Short winter days can force rushed descents—plan turnaround times.
3) Build a simple route plan (Plan A/B/C)
Use a mapping app and topo layers to choose terrain that matches the day’s hazard. Your route plan should include:
- Aspects/elevations to avoid based on the forecast
- Decision points (where you’ll re-evaluate)
- Bail options (shorter exits, safer descents)
- Emergency access (trailheads, signal zones, fastest egress)
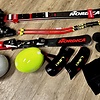
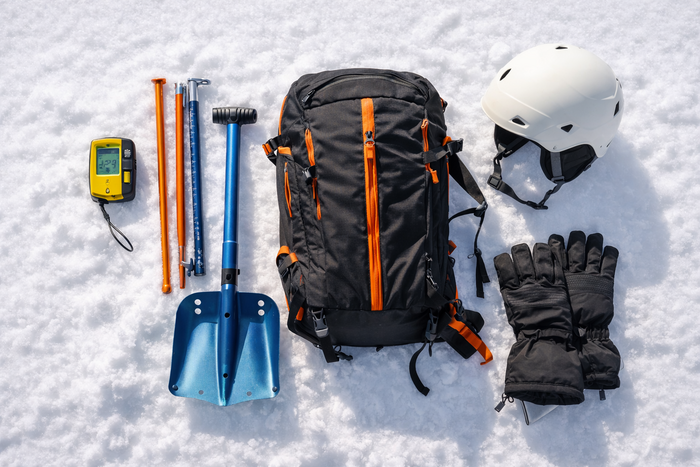
Essential Gear for Backcountry Ski Safety (And How to Use It)
Gear can’t replace judgment, but the right equipment and regular practice can save lives. Here’s the baseline kit for backcountry ski safety.
Avalanche rescue essentials (non-negotiable)
- Avalanche transceiver (beacon)
- Probe
- Shovel (metal blade preferred)
Everyone in the group must carry these, and everyone must know how to use them. Practice multiple times per season, especially the first five minutes of a rescue (signal search, coarse search, fine search, probing, strategic shovelling).
Strongly recommended safety add-ons
- Helmet (especially in trees, couloirs, or firm conditions)
- Airbag pack (adds a margin of safety in some avalanche scenarios)
- First aid kit (trauma-focused supplies)
- Repair kit (ski straps, multitool, spare parts for bindings/skins)
- Headlamp (with fresh batteries)
- Emergency insulation (bivy or space blanket, extra layers)
- Navigation tools (offline maps, compass, charged phone/power bank)
- Communication (satellite messenger where cell service is unreliable)
Gear check: the 60-second routine at the trailhead
- Beacon on, worn correctly, and transmit confirmed
- Partner beacon check (send/receive)
- Probe and shovel accessible (not buried under lunch)
- Skins, binding mode, and brakes/leashes set
- Map downloaded and route visible
Group Management: The Most Overlooked Ski Touring Safety Skill
Many backcountry problems aren’t purely snowpack-related; they’re group-related. Clear communication, spacing, and decision-making protocols reduce exposure and keep small issues from escalating into potentially dangerous ones.
Before you start: align on goals and limits
- What terrain is acceptable today? (angle limit, avoiding overhead hazard, no-go zones)
- What’s the turnaround time?
- Who is navigating? Who is watching conditions?
- What’s the plan if someone is tired, cold, or uncomfortable?
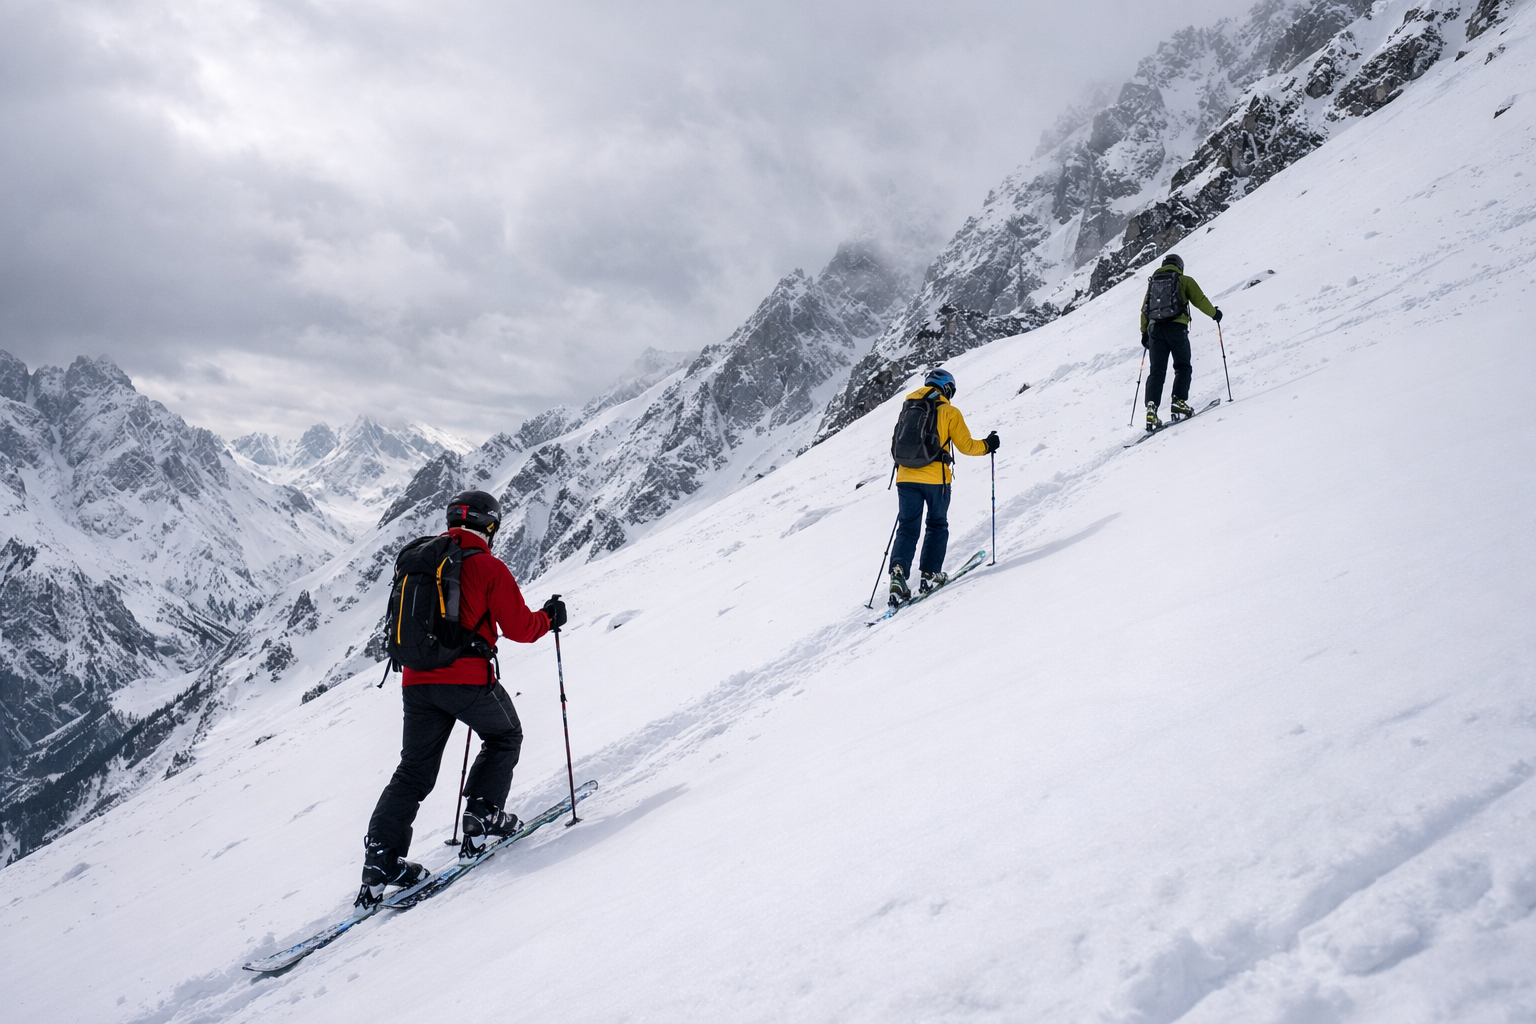
Safe travel techniques in avalanche terrain
- One at a time across exposure (steep start zones, runouts, terrain traps)
- Regroup in safe islands (ridges, dense stands away from runouts)
- Maintain spacing on ascents to reduce loading and exposure
- Watch partners continuously—don’t drop in until the previous skier is in a safe zone
Avoid common decision traps
Human factors are a major cause of incidents. Be wary of:
- Powder fever and “scarcity” (rushing because it might get tracked out)
- Expert halo, where you assume the strongest skier is automatically right
- Commitment (continuing because you already skinned for hours)
- Social proof (“other tracks are on it”)
Great backcountry skiing tips are simple: slow down, talk more, and choose simpler terrain when uncertain.
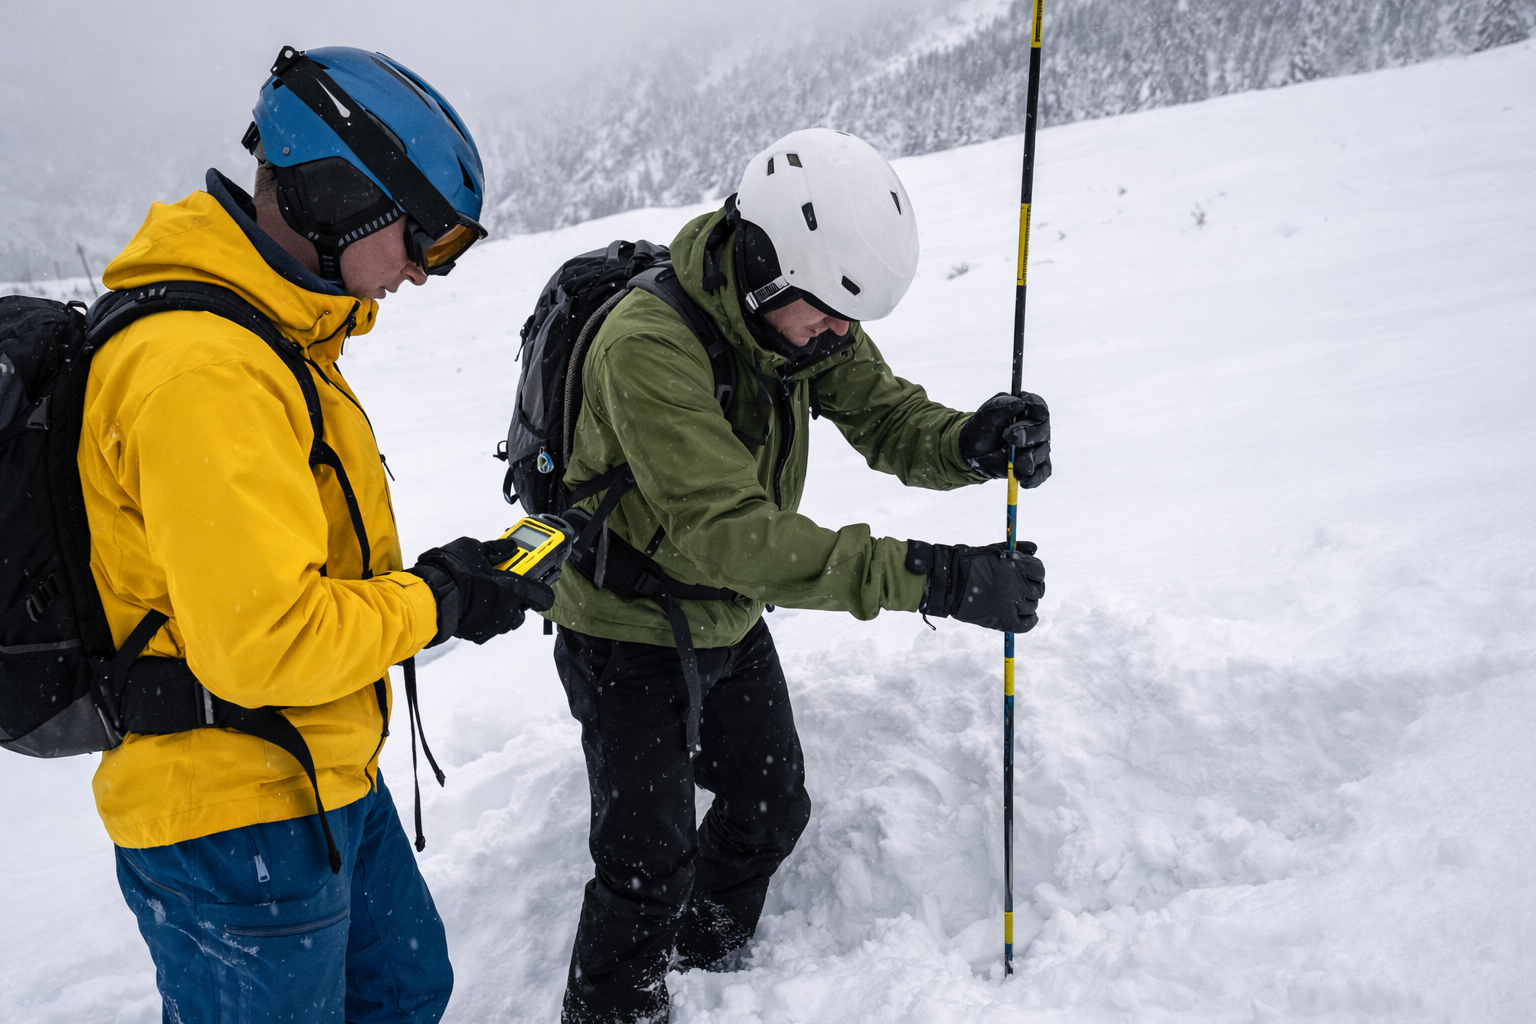
On-the-Ground Observations: How to Keep Updating Your Plan
A forecast is regional; your slope is specific. As you tour, keep gathering clues and compare them to the expected avalanche problems.
What to observe while skinning
- Wind: active drifting? cornice growth? stiff slabs on the lee side?
- New snow amount: more than forecasted?
- Temperature: warming faster than expected?
- Snow feel: hollow “drummy” slabs, cracking, recent crowns?
- Signs of instability: whumping, collapsing, shooting cracks
Use micro-tests wisely
Hand pits, quick pole probes, and small test slopes can provide information, but they can also create false confidence. Treat tests as one data point. If results conflict with red flags or the forecast, default to conservative choices.
Emergency Readiness: What to Do If Things Go Wrong
Even with good safety practices for backcountry skiing, accidents happen. A solid emergency plan improves outcomes.
If an avalanche happens
- Shout and watch the victim (last seen point matters)
- Move to safety (avoid being caught in a secondary slide)
- Switch beacons to search
- Call for help as soon as feasible (delegate this role to someone in your group)
- Conduct a fast, organized rescue (probe, then strategic shovelling).
- First aid and hypothermia prevention immediately after extrication
Time is critical. That’s why practice matters beforehand so you can be prepared in the event of an emergency.
If someone is injured or lost
- Stop the bleeding, manage pain, and insulate from the ground
- Prevent hypothermia (extra layers, wind protection, warm fluids if possible)
- Use precise location info (GPS coordinates) for rescue services
- Decide early whether self-evacuation is realistic
Training & Progression: The Fastest Way to Improve Safety
Buying gear is easy, but building competence takes intention. The best long-term investment in ski touring safety is education and mentorship.
Recommended learning path
- Avalanche education: Intro avalanche course (often called AST Level 1) plus regular refreshers to maintain your knowledge
- Rescue practice: Beacon drills in early and mid-season
- Guided days: Learn terrain selection and pacing from professionals
- Progress gradually: Start with low-angle tours and simple terrain, then increase complexity
A simple progression framework
- Step 1: Low-angle (<30°), no overhead hazard, clear navigation
- Step 2: Add mild complexity (glades, small features), maintain conservative margins
- Step 3: Steeper/connected terrain only when conditions and team skills justify it
Shop Smarter, Tour Safer: Build Your Safety Kit Today
Ready to upgrade your backcountry ski safety setup? Start with the essentials—beacon, probe, and shovel—then add the layers that support real-world touring: reliable navigation, repair tools, first aid, and an avalanche airbag if it fits your objectives. If you’re not sure what’s best for your terrain and experience level, our team can help you choose compatible, tour-ready gear.
Talk to a Gear Expert to build a kit that supports better decisions and safer days in the mountains.